Find Us:
77 Fernvale Rd
Brassall QLD 4305
(07) 3201 8630
Open:
Tue-Sun 9am - 4pm

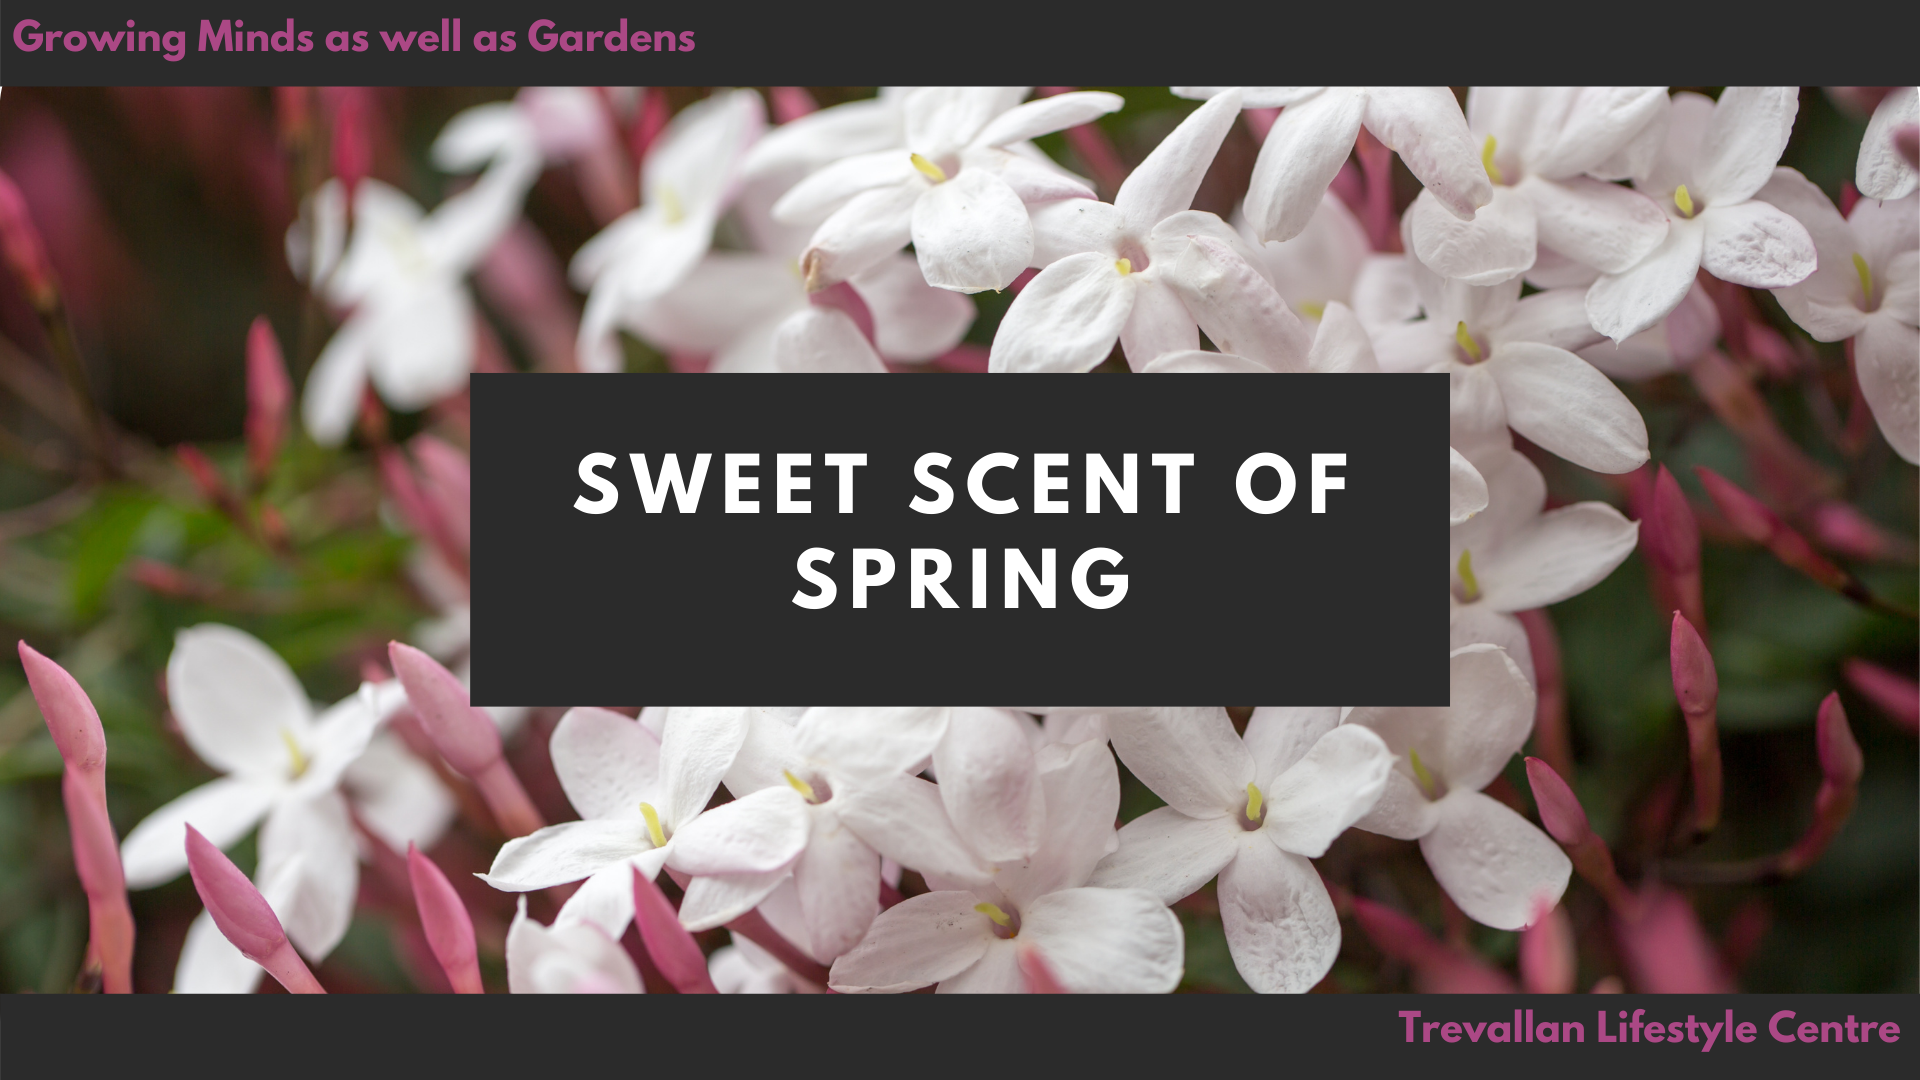
Australian Native Kangaroo Paws
Kangaroo paws belong to the genus Anigozanthos, which are native to south western Western Australia. This area of Australia is dryer, slightly warmer and the soil is sandy...very sandy. A little different to Ipswich's climate and soil.
You know how as a kid you thought your mum was the vegie monster because she made you eat food like Brussel sprouts but as you get older the idea of Brussel sprouts for dinner grows on you till somehow you find yourself not only buying them and cooking them but also enjoying them.
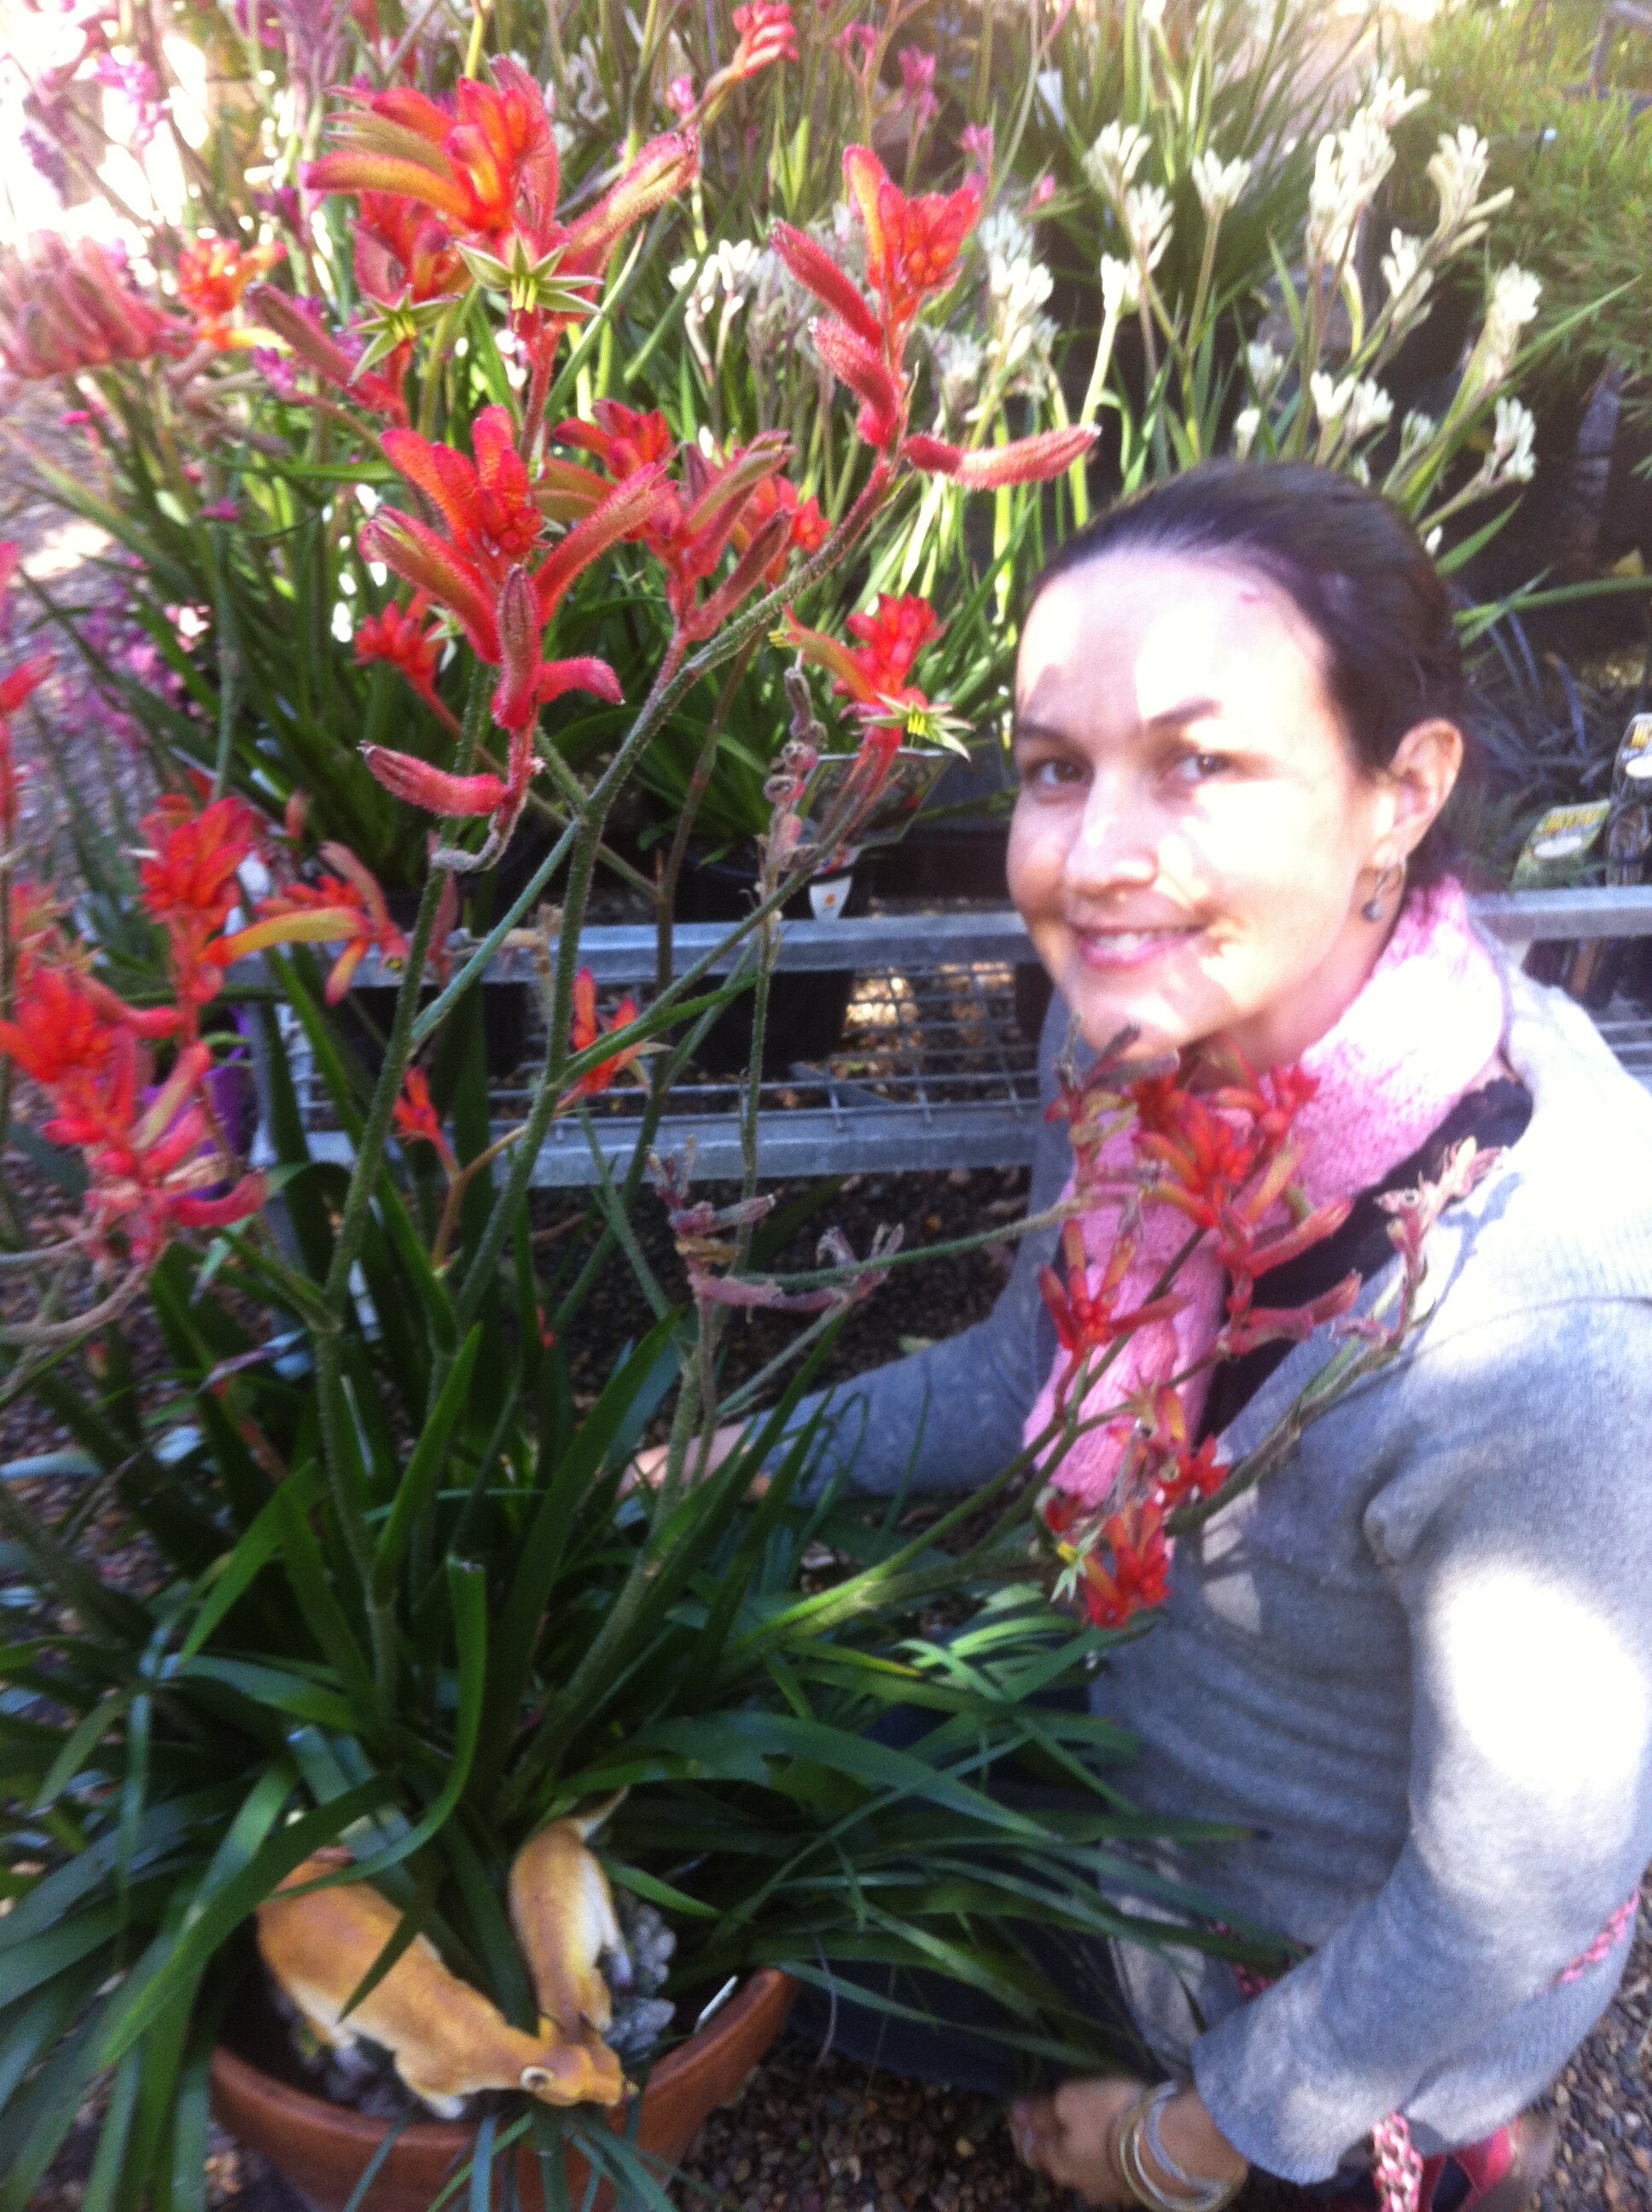
Kangaroo Paw, an Australian Native Plant
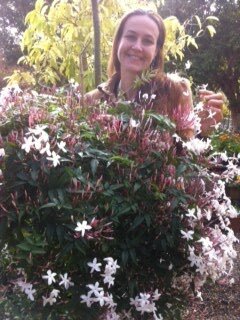
Kangaroo Paws are kind of like my Brussel sprout in the garden! For years I would almost double over in pain at the idea of growing one of these hideous plants. Why? I couldn’t come to terms with a plant that had gangly disease ridden leaves and long boring flowers.
I guess I just had never seen it used well in landscaping because now I am totally in love. Why? Strangely enough it was Ipswich City Council and the Riverheart parklands that caused me to start to fall in love with them because a few years ago they were planted en masse in the gardens and they looked fantastic most of the year.
Kangaroo Paws belong to the genus Anigozanthos, native to south-western Western Australia. A region that’s drier, hotter, and has very sandy soil. Quite different from Ipswich's heavier soils and sticky summer air.
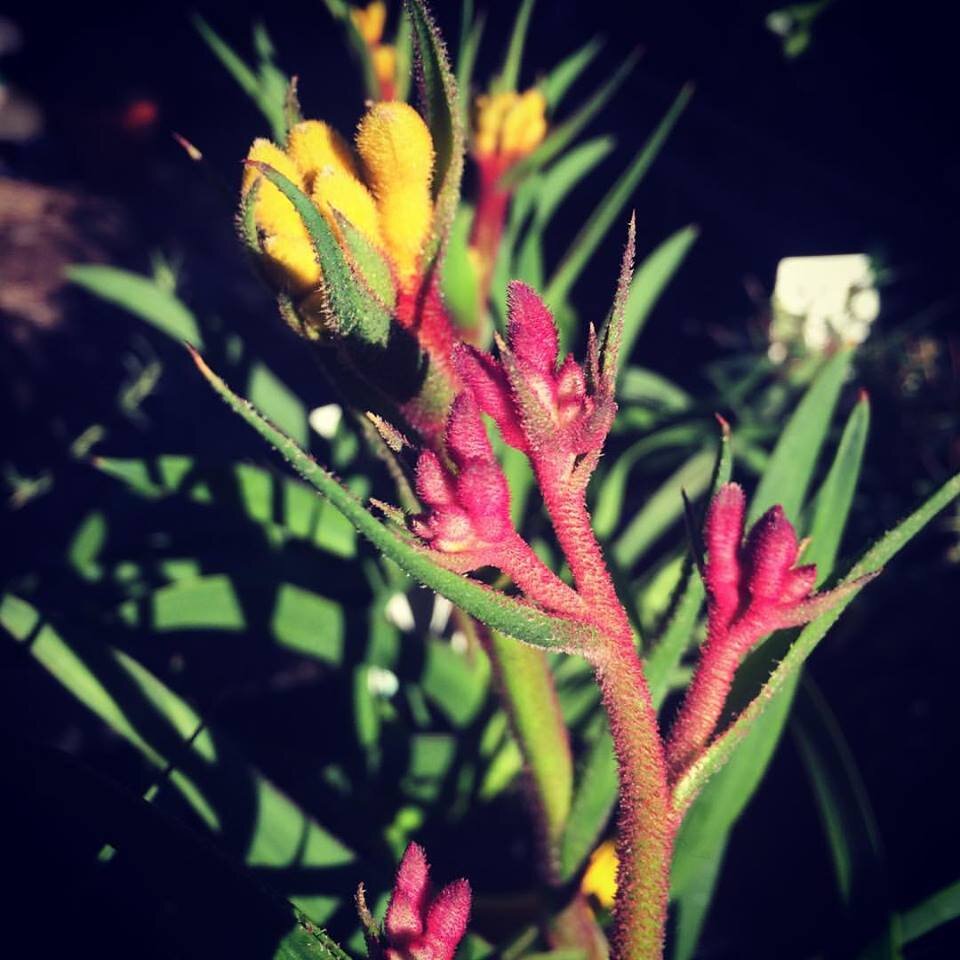
And that’s where a lot of the trouble starts. One of the main reasons I disliked Kangaroo Paws was because of the dreaded ink spot, those black patches that ruin the leaves. It’s mostly caused by fungal diseases thanks to humidity, but frost damage and snails can also contribute. Parts of Ipswich can swing between high humidity and black frosts, basically, Kangaroo Paw hell.
Some newer cultivars, like the Celebration series, recommend growing in pots in a partially shaded spot and only in areas with less than 70% humidity (Ipswich averaged around 75% in summer 2024). So while Kangaroo Paws traditionally love full sun and excellent drainage, if you're in a more humid region like ours, pots in airy spaces with morning sun might be the better way to go. Terracotta pots are a great choice too, because they breathe. If you want to grow Kangaroo Paws out in the garden, try going for the older varieties like Anigozanthos flavidus or the red and yellow flowering forms in the Bush Gem series.
Most sprays or fertilisation will not prevent Ink spot. Thanks to Angus Stewart, the main cultivator of Kangaroo Paws, I now know the best and easiest way to deal with ink spot! Mow over them when the leaves start to become infected and fertilise with a complete organic slow release fertiliser like Organic Link! Secateurs would work just as well as a mower but nowhere near as fun!
By cutting all that leaf off, you get get rid of Ink spot and encourage beautiful, fresh new leaf which gives the plant a really vigorous green appearance and promotes the flowers and the flowers are the best part.
Kangaroo Paw flowers have been described as one of Australia’s most striking and unusual flowers and with modern cultivation I think there is one available in in all the colours of the rainbow, hot pink, red and green and the black are my favourite.
These fabulous bird-attracting, drought tolerant plants grow to all different sizes too. From small boarder plants to large striking feature plants there is one suit all gardens. All they need is a dry well drained spot in full sun and easily accessible by mower (or Secateurs)!
I love using a mixture of flowering heights in pots too. They make an awesome feature in a hot area of your patio or garden. Just remember to remove the spent flowers and yucky leaves and this plant should reward you with vibrant colour most of the year.
This weekend eat some Brussel sprouts and plant an icon of the Australian garden at your house.

My List of Jobs to Do in September
Some inspiration to get you out in the garden this September
As spring bursts forth with its lively colours, it's the season when our gardens come alive with potential. Springtime signals a call to action in the garden, these are my crucial first steps to take as we wave goodbye to winter and embrace the time of growth and blossoms. From swapping out those fruit fly traps to giving our lawns some much-needed attention, and indulging in the satisfying trim, fertilise, and mulch routine, let's embark on a journey to transform our outdoor spaces into vibrant and thriving oasis.

Change my Fruit Fly Wick
As we kick off the new season, have you taken the time to replace the wick on your trusty Searles Fruit Fly Trap lately? As per recommendation, I switch out the wick every three months, aligning it with the changing seasons. I actually keep the trap active throughout the entire year because, believe it or not, even in Ipswich, those fruit flies can be surprisingly persistent, even when the weather cools down.
And if you're scratching your head wondering what fruit flies are all about or simply want to dive deeper into the world of this native pest, take a stroll through my blog.
Don’t do the Bindii Dance this Summer!
At the beginning of each season, especially Spring, I take the time to give my lawn some TLC. A healthy lawn with strong roots is not only easier to manage but can bounce back swiftly from water scarcity or a lawn grub invasion.
When my lawn isn't at its best, I keep a close watch for the tell tale signs of weeds, especially the notorious bindii. A thick and robust lawn naturally crowds out these intruders, sparing me the chore of constant weeding. My mowing routine always includes using a catcher, and if I have to resort to spraying, I do so before weeds have a chance to bloom and spread.
For more information on keeping your lawn looking good check out our Lawn Challenge
Repot or not to Repot all your indoor and outdoor potted plants?

Searles' Recharge Recharges old potting mixes
When it comes to repotting or potting up my plants, I consistently choose top-quality potting mix like Searles Platinum Premium Potting Mix. This exceptional blend incorporates key elements: a soil wetter to enhance water penetration, water crystals for improved soil water retention, and a dependable slow-release fertiliser to nourish my plants.
For situations where repotting isn't necessary or when I don’t want to repot, I rely on Searles Recharge® Sprinkle & Grow. This remarkable product rejuvenates potted plants and hanging baskets through a combination of controlled-release and instant fertilisers, along with the added benefit of Penetraide Re-Wetting Granules. These granules effectively prevent old potting mix from becoming hydrophobic, ensuring efficient water and fertiliser absorption at the root level. It's an excellent solution for reviving aging potting mixes, depleted soils, and budget-friendly potting blends, ultimately revitalising my potted plants.
Plant any fruit trees I can get my hands on
Planting season is in full swing, and I'm all about getting my hands on any fruit trees I can find! Whether it's figs, avocados, citrus, mulberries, guavas, kiwi fruit, persimmons, pomegranates, olives, or mangos, I'm putting them all in sunny, open spots. The goal? To let these trees take root and thrive before the scorching summer heat and dry spell hits.
Actually, scratch that—I'm up for planting just about anything I can get my hands on right now. This is the prime time to be out in the garden, getting your hands dirty. Whenever I'm doing any planting in my garden, I swear by Searles Garden Soil. Planting directly into this superb mix gives my plants the absolute best start in life.
So why are you still reading this? Get out there and get busy! Plant now, before it gets too hot, too dry, and just plain unpleasant. Your garden will thank you later!
Get the Vegetable Garden Ready

With the changing weather, it's that time again to prepare my vegetable gardens for new plants. Out go the winter vegetables, making way for enriching the soil with a hearty dose of compost and microbes. I always try to designate a corner of my vegetable garden to green manure crops, which I'll dig right back into the soil for an extra boost.
If you're new to vegetable gardening, I've got some quick tips for setting up a new bed that you can check out here.
Once the vegetable patch is cleared and the soil is enriched with compost, it's time to get those summer vegetables in the ground. Think tomatoes, beans, capsicum, carrots, eggplants, cucumbers, watermelons, pumpkins, squash, zucchinis, lettuce, and corn—just to name a few of the varieties perfect for planting now. I like to use a mix of seeds and seedlings, so my crops have a staggered growth. It's all about maximizing that garden yield!
Fertilise Strawberries and Herbs
If your strawberry plants appear to be in good health, it's a good idea to fertilise them with granular sulphate of potash. This will encourage a second round of flowering and fruiting, extending your strawberry harvest.
However, if your strawberry plants and other perennial herbs are showing signs of stress or are not as robust as you'd like them to be, it's time to give them a boost. Consider using Organic Link for overall soil enrichment, along with a high-quality liquid fertiliser like Triple Boost to provide them with essential nutrients for improved growth and vitality. Your plants will thank you for the extra care!
Fertilise and Trim
This is the ideal moment to encourage fresh new leaf growth and the formation of flower buds in your gardens and pots. Begin by delicately pruning away any old growth that has been affected by the cold or has become overly tall and spindly. Afterward, consider fertilising and soil wetting the soil.
Our preferred choices for fertilisers are Organic Link and Triple Boost, and we utilize both granular and liquid soil wetters to ensure your plants get the best care possible. Your garden will thrive with these steps!
Mulch
Mulch all garden beds and pots. It not only helps with water retention, it helps keep soil temperature even and encourages plant growth. Spread a 5 – 10cm layer of organic mulch around plants.
Seize the slighter warmer weather - get outside and enjoy.

Planting Sweet Peas
Sweet Peas are a fragrant spring flowering annual, native to Italy. They have one of the most enchanting flowers, delicate and fragrant, perfect in garden or admired in a vase. Learn how to grow Sweet Peas in Ipswich.
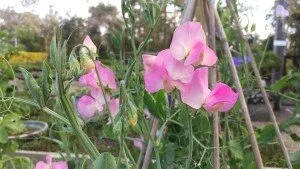
Sweet pea flowers from The Mountain Man
Sweet Peas are a fragrant spring flowering annual, native to Italy. They have one of the most enchanting flowers, delicate and fragrant, perfect in garden or admired in a vase.
Tradition dictates that March 17th (St Patrick's day) is the time to plant Sweet pea seeds. Have you ever wondered why?
Planting PEA seeds on St Patrick's Day is an old American tradition. As you will need the 'luck of the Irish' to get plants to grow while there is still snow on the ground!!!
For us here in Australia, we still follow this tradition because lets be honest here in Ipswich we need the 'luck of the Irish' to get sweet peas flowering and looking good. Normally, March is still too warm to start our winter gardens here in SE QLD.
Instead I use time as a reminder to prepare my soil.
Noel Burdette used to live here in the Ipswich region. Years ago he offered me this great advice about preparing the soil for Sweet Peas. This information is for sweet peas but can be applied to any peas.
Noel's Sweet Pea Advice
Sweet peas like a full sun position in the garden with plenty of airflow to minimise any fungal concerns.
They also enjoy a slightly higher level of pH in the soil, somewhere between 7.5 - 8.5. You can adjust your pH by applying a generous amount of Dolomite (provide much needed Magnesium) or a light dusting of Lime (as the calcium content is important).
They love well composted soil. We use Searles Compost but a little well aged sheep, cow or chicken manure worked into the soil would also help to encourage good drainage, yet adequate moisture retention.
Usually around mid April is a good time to plant out your seeds or the first quarter moon after St Patricks Day. Noel recommends to soak them overnight in a little water with a small amount of Condi's crystals (usually get this at a chemist) as this will encourage a higher percentage of germination.
After planting the seeds in the ground, water them in once and don't water again until they are "up and out "of the ground.
Pinch out any lateral growth in the early stages as what you're looking for are strong, upright plants that will then branch out as they get older and provide long lasting, fragrant blooms from late winter and into spring.
Fertilise your Sweet Peas with Organic Link when first growth appears and then alternating fortnightly between Triple Boost and Silica and Potash Liquid fertiliser.

Sweet Pea Fragrant spring flowering annual, used as cut flower, native to Italy
All sweet peas are climbing. Some are dwarf climbers (only grow to about 50cm) and others can grow to over 2m.
With all types of sweet peas, ensure they have somewhere to stretch their tendrils (fences or tepees) or maybe try them in a hanging basket and let the tendrils hang down.
Trevallan stocks Eden Seeds (non-hybrid open pollinated old fashioned seeds) Sweet Peas and Pohlmans Sweet Pea Seedlings. This year we have two choices in the seeds and the seedlings. The seedlings aren't usually available until April.
Bijou, Dwarf (seeds and seedlings)
Early Gigantea, mixed colours to 3m high, early flowering (seedlings only)
Spencer Choice Mix, The classic English sweetpea, 1902 release developed from Earl of Spencer's garden, climbing (seeds only)
Come into Trevallan and we can help you on your Pea Journey. Good Luck.

Clivia
Clivias have woven their magic around me – a love affair with vibrant clusters of trumpet flowers, ranging from sunny yellows to warm oranges and soothing salmon shades. Their blooms rise gracefully above deep green leaves, creating a symphony of colors that's hard to resist.
These adaptable plants thrive in shade and even embrace sunlight, making them perfect for borders and beneath tree canopies. From August to November, they join the Toowoomba Carnival of Flowers in a breathtaking dance of colors.

Clivias, how can I not fall in love?
These beautiful evergreen plant has clusters of vibrant yellow throated, orange or salmon trumpet flowers. Sometimes with new breeding the flowers will have a combination of colours. The flowers are held on stalks above the clump of dark green strap-like leaves.
It is a beautiful shade plant, that can tolerate light sun. It is perfect for borders or mass planted under trees. It flowers August to November and over the years has become synonymous with the Toowoomba Carnival of Flowers.
They love to be pot bound and I find they flower better when they are in a good sized clump. In the past people have believed they are shy to flower. I was once told that they won’t flower unless they have at least 12 leaves all up (six on each side).
They can handle the cold and the heat and once established can handle periods of dry. I try to fertilise mine with Organic Link about every three months and liquid fertilise them with Triple Boost and Neem oil about every fortnight. They are an extremely hardy plant.
One insect that does love them and will cause mass devastation is Brithys crini. It’s larvae is commonly called Lily Caterpillar.
Young caterpillars skeletonise leaves while older caterpillars will attack the crown of the plant. In no time at all the plant can be destroyed.
The adult moth has a wingspan approximately 5cm across and lays eggs in clusters on susceptible plants. The caterpillar grows up to 5cm long and is a black and mottled grey colour. They have several distinctive yellow and/or white stripes running length ways down their body.
There are several generations a year with the most damage noticed during the warmer months. In home gardens it is better to rely on mechanical control (your hands!). Look for discoloured feeding patches on leaves and then crush the young larvae before they develop. For heavily infested leaves it often is better to cut out the leaves and destroy them (do not add to compost bays). If you need to spray I prefer using Dipel or Neem oil but make sure you drench the crown of the plant and the surrounding soil.

In high humidity mealy bugs can also cause problems with your Clivias but the regular application of Neem oil will also help solve this problem.
If you are wondering, the proper pronunciation should follow the plant’s namesake - Lady Clive. It should be pronounced with a long “i,” Klyveea (rhymes with “jive”).

Scented Magnolias
No fragrant garden is complete without the popular Port wine Magnolia, Magnolia figo, and it’s sister Magnolia Coco.

Port wine Magnolia, Magnolia figo
No fragrant garden is complete without the popular Port wine Magnolia, Magnolia figo, and it’s sister Magnolia Coco.
Coco is more like another version of Magnolia figo (hybrid) .... not better just different.
Coco has extremely scented creamy flowers edged in burgundy. It flowers late winter into spring and spot flowers during summer. Magnolia figo has smaller flowers and are a deep purple wine colour. Both flowers form up the stems of the tree and are extremely prolific.
Both are highly scented but I find Coco's scent is a lot stronger than figo. Magnolia figo’s scent seems to waft through the air early evening and night where as Coco has a definite strong scent all day and evening. Beneficial insects also love the flowers, maybe even more than me!

Magnolia Coco
Both have glossy green leaves but I find Coco has a slightly looser habit and grows slightly wider and taller (around 3-4m). Magnolia figo can grow to about 2-3m and has a tighter denser foliage. I think Magnolia figo is more suited to hedging and Coco is suited to an amazing as a stand alone shrub.
They will grow in full sun to full shade but they are a lot slower in the shade. They like a slightly acidic soil and I find they perform better if they are regularly fertilised with Organic Link and tip pruned.
I have seen them growing in large pots but they need a lot more fertilising and care.
They are dry tolerant once established and don't mind the cold. If it gets really cold where you are they may be slower growing.
Note
Michelia is a genus of flowering plants belonging to the Magnolia family. Recently the michelia was dropped and replaced by magnolia.
Port wine magnolias botanical name is now Magnolia figo and Michelia coco is now called Magnolia Coco.

Native Ground Cover
Scaevolas are a hardy, low growing plant with lush green foliage all year long. They have striking fan-shaped flowers that cover the bush for most of the year. You can get them in a range of colours - blue, pink, white and yellow.
The Fanfare range of groundcovers is a must have for your native garden.
Scaevolas are a hardy, low growing plant with lush green foliage all year long. They have striking fan-shaped flowers that cover the bush for most of the year. You can get them in a range of colours - blue, pink, white and yellow.

This Australian native is heat & drought tolerant and has a trailing and cascading habit making them a great choice for hanging baskets, underplanting under trees in gardens, cascading over retaining walls, in large pots as a glorious spiller as well as being just a great plant for the garden.
Scaevolas suit all style gardens from native gardens to tropical and even cottage gardens.
It seems to handle the cold (not heavy frosts), wind and the heat. It loves free draining soils and hates wet feet. Mulch well and keep slightly dry in summer as it hates humidity. As Scaevolas never stop flowering I find giving them small tip prunes regularly and liquid fertilising with Triple Boost every fortnight keeps them looking fantastic.
While Scaevolas love the sun they can handle a little bit of shade.
Even the bees and butterflies love it!

Yesterday, Today and Tomorrow
The true beauty of Brunfelsia latifolia is in its flowers. Sweetly perfumed, they appear from September to late November. When they first open they are a violet colour, fading to lavender blue and then white, with the three colours present on the bush at the same time. How extraordinary that a plant can be covered in three different coloured flowers at once!
I’m noticing this plant in flower everywhere at the moment - Brunfelsia latifolia, Yesterday, Today, Tomorrow. It’s been a great season for them and I think all of them are stepping out of the shadows to scream ‘Look at me’.
I like to refer to this plant as a vintage plant as there is no such thing as old fashioned in gardening.
This evergreen shrub grows slowly to around 2-4m tall and 2m wide. Most people tend to keep theirs at around the 1.5m mark. The foliage is dense and a smoky green colour. The new leaves can go purplish in cool weather.
The true beauty of Brunfelsia latifolia is in its flowers. Sweetly perfumed, they appear from September to late November. When they first open they are a violet colour, fading to lavender blue and then white, with the three colours present on the bush at the same time. How extraordinary that a plant can be covered in three different coloured flowers at once!
Brunfelsia latifolia enjoys full sun or partial shade. It enjoys a trim but does not need to be trimmed to look thick and lush.
I find all Brunfelsias can be hungry plants. I like to feed them with Organic Link four times a year and I give them liquid bio trace (mix of trace elements by Plant of Health) at least three times a year.
The great thing about this plant is, once established, it doesn’t seem to mind if it’s a little dry or a little wet; it likes the summer heat and can handle the winter chills. It’s not keen on heavy frosts, though.
I find they grow better in the ground but I have seen some nice ones in pots. I would just recommend feeding it more.
Years ago, a dwarf brunfelsia latifolia was released that only grows to around a metre. It is perfect for borders or small gardens. Be aware that this plant can be slower to flower.
The only downside to brunfelsia latifolia is that they are highly toxic to animals and humans if eaten, so if you have an animal, especially a goat or a friend that is a vegan that likes to eat the plants in your garden, please take precautions.
Indulge all of your senses by planting a brunfelsia latifolia this weekend!
My Dirty Little Secret
I love the scent wafting in the air, just a hint of spring. I love getting up close and breathing deeply letting the fragrance fill me. I love how it captures me and makes me want more. Oh how glorious it would be to be surrounded by Jasmine polyanthums.
Every year around this time my secret love affair starts.
It starts off slow with only a hint of the love and pure joy that will come as the days turn into weeks and finally months.
Then it’s gone. All the happiness and pleasure gone and I come crashing back down to earth.
Jasmine Polyanthum in full bloom. I love this scent.
I have to keep my love a secret as so many people disagree with me plus this love is just so, so, so common!
But I’ll let you in on my dirty little secret…. I love Jasmine polyanthum. They give my end of winter start of the westerly winds blues the TLC I need to continue. I know spring will be here soon.
I love nearly everything about this plant.
I love the soft feather like foliage, the deep green lushness of its leaves.
I love the way it soft stems intertwine themselves and fall gracefully down.
I love how the pink buds form at the end of winter, letting me know the end of this cold is close.
I love watching the deep pink buds open to the purest white flower.
But most of all I love the scent.
I love the scent wafting in the air, just a hint of spring. I love getting up close and breathing deeply letting the fragrance fill me. I love how it captures me and makes me want more. Oh how glorious it would be to be surrounded by Jasmine polyanthums.

Every year I forget what their scent does to me. Then I start to notice them everywhere. This beautiful dense climber with pink buds and then they buds open and I’m in love all over again.
While Jasmine polyanthums are beautiful at this time of year reality hits around autumn and winter when they have a tendency to look a little shabby. I have found that a good fertilise with Organic Link Fertiliser and trim after flowering (November) and just before flowering (June) helps keep them looking neat and beautiful.
Jasmine polyanthums love the full sun but can grow in some shade. They are a very vigorous climber and can cover an area quite quickly.
If you don’t have anywhere for them to climb don’t worry they look glorious in hanging baskets or trailing over the edges of retaining walls.
I have even seen some Jasmine polyanthums climbing on chain link fence and they were so highly trimmed it looked like a box hedge.
These plants are hardy – they don’t mind a little bit of dry weather or a little bit of wet weather. They seem to handle the cold and the heat and once established can handle most soil types.
Jasmine flowers are also commonly used as aphrodisiacs so make sure you like your neighbours before you use it on your fencing!
Also for many people the scent can be very overpowering and even a bit sickly so do be mindful of where you plant it.
This weekend give your love life some TLC and bring a Jasmine polyanthum home, it can even stay inside for a few days too, so you can enjoy the scent 24/7.

Growing Spring Flowering Bulbs in South East Queensland
Spring Flowering Bulbs in South East Queensland seem like a waste of time, don’t despair though we can still plant some beautiful bulbs, corms, and tubers, we just need to change what we plant!

Ranunculus flowers almost look too good to be real. These are an easy to grow Spring Bulb
Bulbs, corms and tubers are all sometimes erroneously referred to as bulbs. The technical term for plants that form underground storage organs is geophyte. All these types of plants cycle through vegetative and reproductive growth stages; the bulb grows to flowering size during the vegetative stage and the plant flowers during the reproductive stage.
These plants need certain conditions to trigger the transition from one stage to the next, such as the shift from a cold winter to warm spring.
Due to the bulb, corm or tuber being a storage device, these plants can also survive adverse conditions such as cold, excessive heat, lack of light or drought.
The foliage of these plants absorb nutrients from the soil and energy from the sun for setting flowers for the next year. After the foliage period is complete, bulbs can be dug up for replanting elsewhere.
I just love the idea of my garden bursting with colour and scent in the Spring, like they do down south or overseas, but sadly, Spring flowering bulbs in South East Queensland just don’t really live up to the expectation.

Hippeastrum reticulatum var. striatifolium
Don’t despair though, we can still plant some beautiful bulbs, corms, and tubers, we just have to accept that our choices are different to the southern states. We can still grow tulips, hyacinths, daffodils, ranunculus and anemone here in South East Queensland. It's just they will never grow like they do down south or in Europe. They usually only flower for just one season and we treat them the same as other flowering annuals such as marigolds, pansies or petunias.
If you want bulbs that will naturalise and come up year after year in your garden and pots, you can happily choose bulbs such as Freesias, Ixia, Sparaxis, Jonquils, Babiana, Tritonia, Leucojum aestivum, Eucharis, Sprekelia, Zephyranthes, Rex Begionas or Proiphys cunninghamii (Brisbane Lily). Don't forget we also have some great summer bulbs/corms/tubers like Hippeastrums, Scadoxus, Haemanthus, Caladiums and ornamental Gingers. We are slowly building up our bulb collection here at Trevallan… SHOP BULBS HERE
When I am looking for new bulbs to plant out, I like to look for flowering bulbs native to South Africa, as I find these do a lot better in South East Queensland.
In my quest to achieve a garden that comes alive with flowering bulbs, I asked Claire Bickle from Gardening for the GoodLife to give me a few tips on how to achieve this daunting task!
Claire Bickle's Tips for Growing Bulbs
Place larger bulbs, such as jonquils, hyacinths, daffodils and tulips in a paper bag in the crisper drawer of the fridge for 4-6 weeks before planting. This gives them the chill down they would not otherwise receive in our mild autumns.
Ranunculus corms are best spread out on a thick wad of wet newspaper and covered with another reasonably damp wad overnight before planting the next day. This helps the corms to swell and get ready for shooting once planted.
If growing in pots, use a good quality potting mix and ensure the pots have good drainage. Shallow pots work quite well too and remember some bulbs can be planted closely together.
You can fertilise the soil with Organic Link when planting, but there is no need to start fertilising with liquid fertiliser until they have some growth. Then I alternate fortnightly feeds between Triple Boost and Potash and Silica.
When the bulbs have finished flowering, don’t be tempted to cut all the foliage off. Leave it to die down naturally, as this is how the bulb draws back in all it’s nutrients to store away until the next season.

A range of spring flowering bulbs
I am very excited - the bulb garden of my dreams may just be achievable if I change the way I view my end goal. This year I've bought myself a mixture of bulbs like Gladiolus, Iris, Jonquils and Ranunculus and I have interplanted them amongst my annuals like poppies, pansies and lobelia. I can't wait to try out Claire's tips and see what comes up this and hopefully, next year. One thing about gardening which is for sure though is that it's never the same!
Spring is Here. What do I Plant?
Spring is Here. Some inspiring plants that thrive in the spring
Jasmine polyanthum
Few vines rival Jasmine polyanthum for beauty and fragrance. This easy-to-grow climber produces beautiful clusters of starry flowers you can smell from miles away. Most Jasmine polyanthums bloom in late winter or early spring. We have ours in hanging baskets so no need to worry about stakes for these vigorous climbers.
Waterhouse Unipunctata
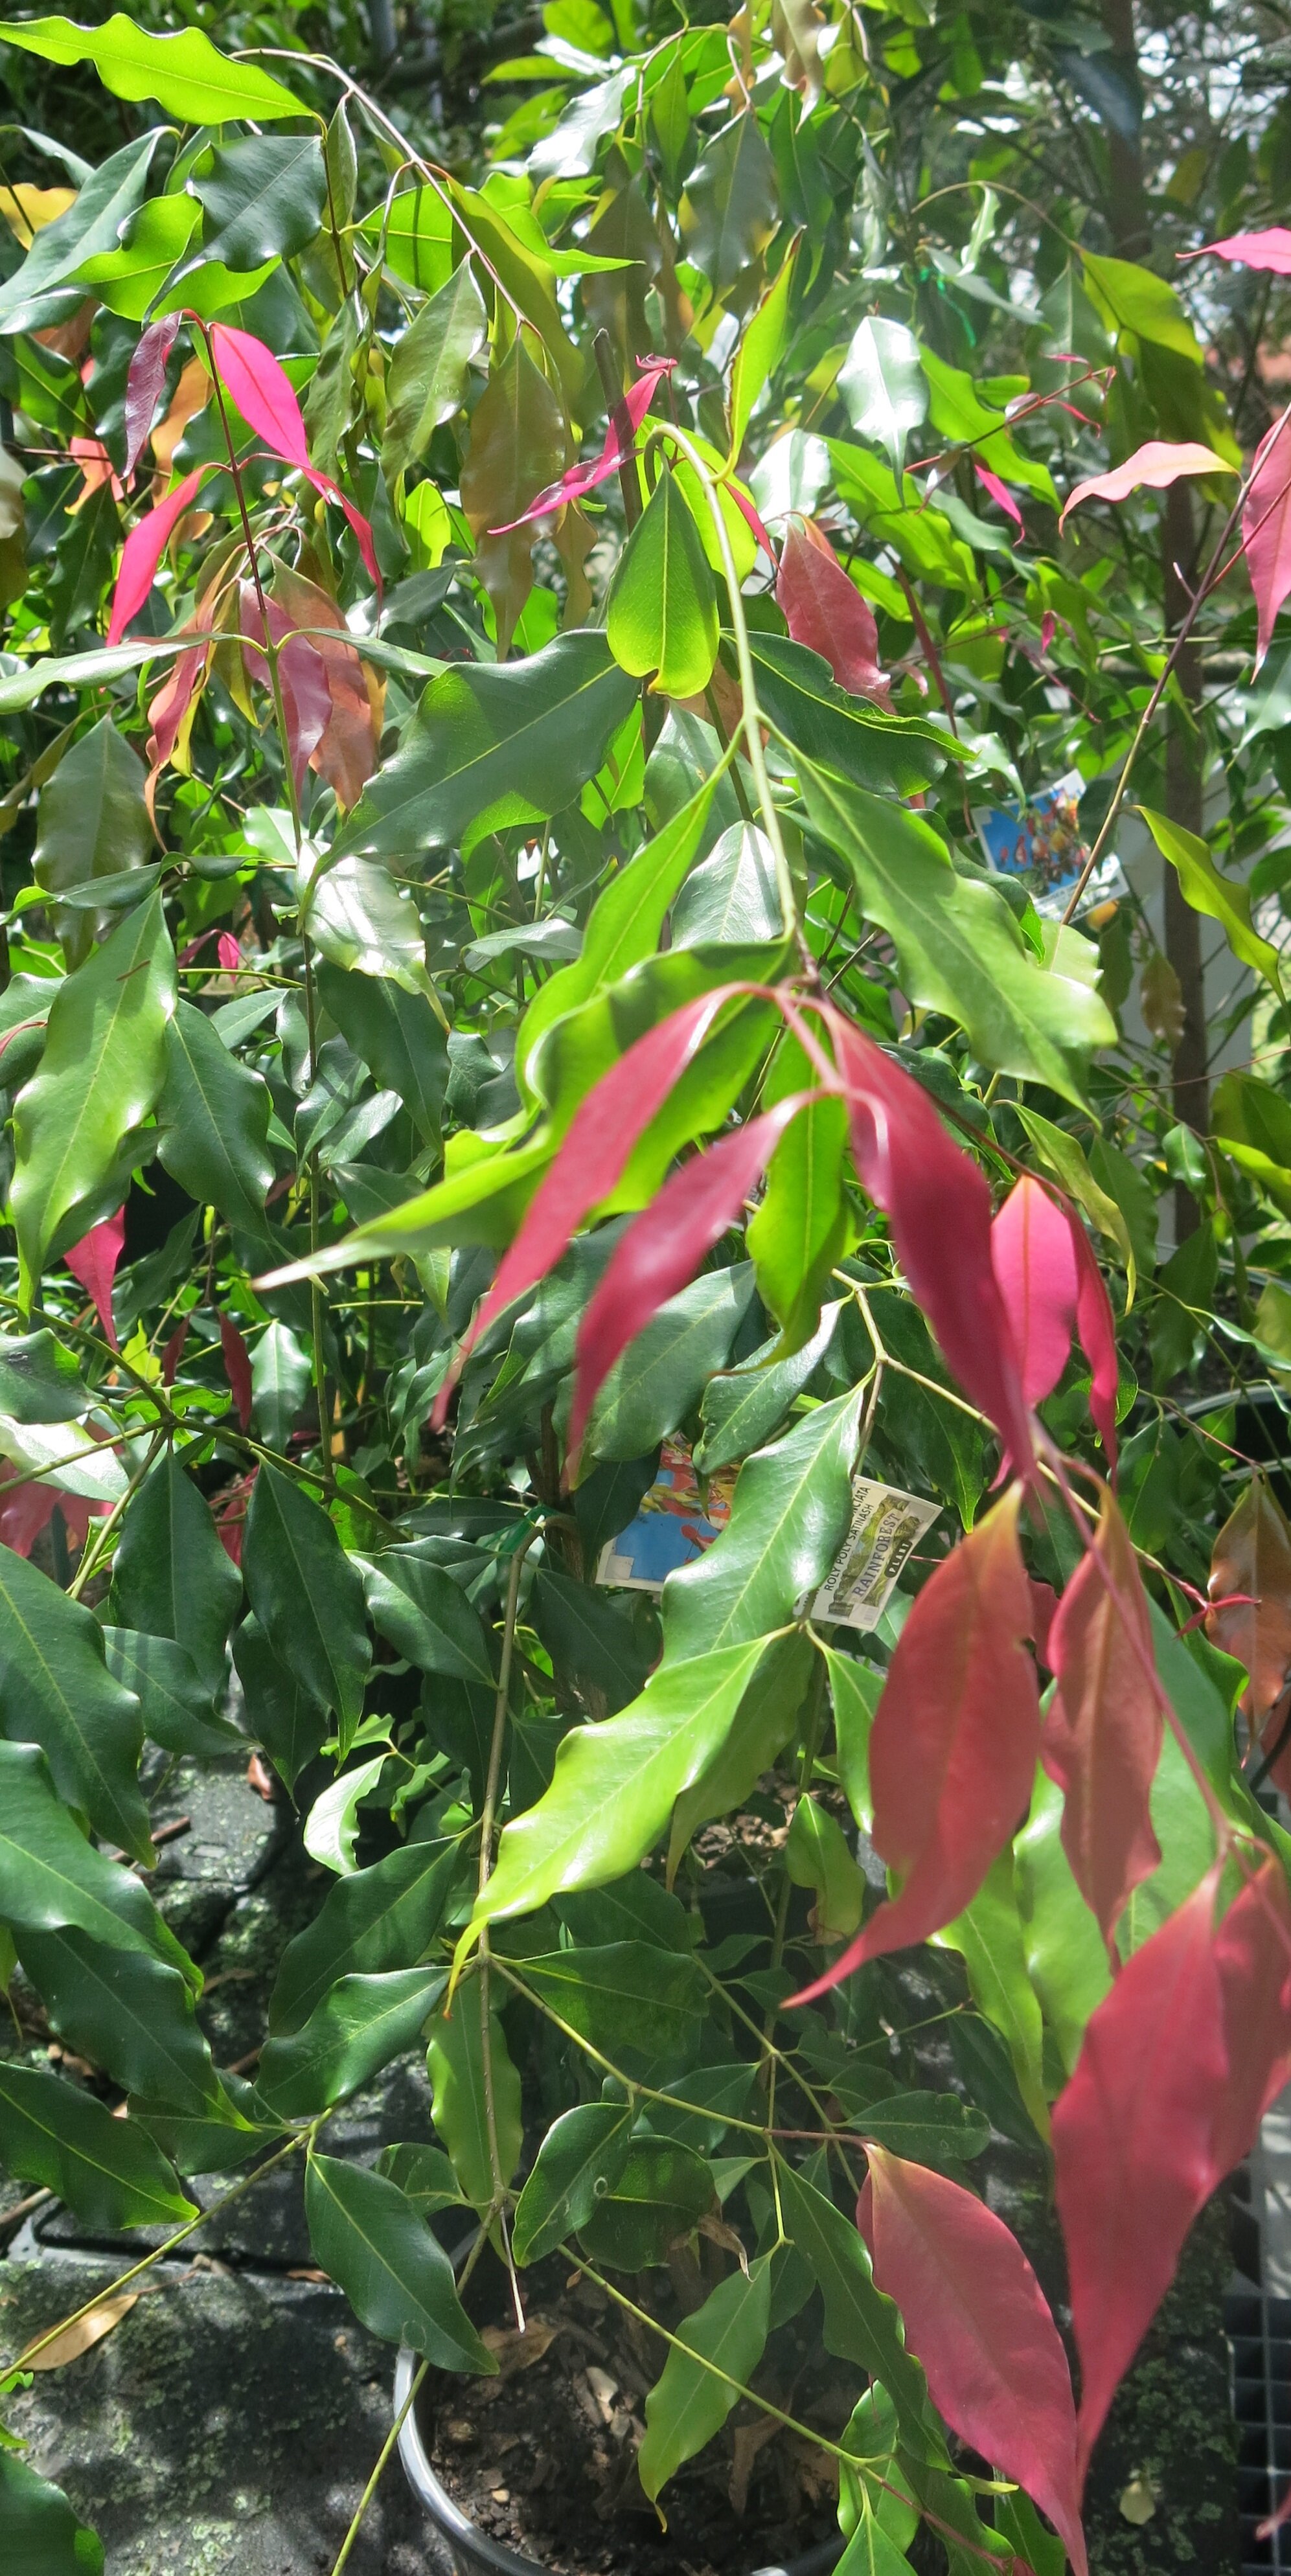
You may think that a native tree that has small white flowers is a little unusual to be included in Plants that I love for Spring. Think again! Waterhousea Unipunctata or Roly Poly Satinash has been included because of its long lasting flushes of brilliant red new growth that cover the plant making it stand out amongst the green backdrop of any garden. Plus its flowers and fruit are a delight to the native fauna. It can handle dry conditions and light frosts once established and likes the full sun.

Osteospermum Copper Amethyst
Osteoperums always bring sunshine and brightness to any garden. There is a range of colours now available so you will find one to suit any garden palette.
They are perfect for gardens or pots and will flower continuously through the warmer months.
You can let it ramble through the garden or keep it neat and tidy by giving it a good trim inbetween flowering. Regular deadheading and fortnightly liquid fertilising will encourage new blooms. Flowers will close up every evening and open up again in early morning.

Lavender
How can one not want the beautiful fragrance of Lavender in their garden? Lavenders can be grown in pots or the garden and flower profusely. Plus they look really pretty as cut flowers.
Give the plants a full sun position in a well-drained soil. Do not overwater as lavender dislikes wet feet, prune after flowering to promote compact growth and mulch well. Drought tolerant once established.
There are so many varieties of Lavender available. I have found French to be the longest lasting in our climate but if you want to try something different you could try Lavender ‘Lavish’ the double flowering lavender or Lavender ‘Silver Lining’ which has an almost white foliage.

Petunia Midnight Gold
We are now stocking a great range of trailing perennials in seedlings and pots. Perfect as living mulches or to jazz up full sun hanging baskets. One of my favourites at the moment is the Petunia Midnight Gold. This petunia features huge double blooms that are a lemony yellow around the outside and deep purple black on the inside. It has exceptional branching habit with profuse flowering making this perfect for hanging baskets.

A Stunning Australian Native Plant
The Alloxylon flammeum, Queensland tree waratah, would have to be one of our favourite Australian native plants.

Photo by Brian Walters from the Australian Native Plants Society
The Alloxylon flammeum, Queensland tree waratah, would have to be boss lady's favourite Australian native plant.
This tree is widely known as one of the most stunning rainforest trees (endemic to North Queensland Rainforest) with a spectacular flowering display in spring. Despite its tropical origin, the tree waratah can be grown in cooler districts at least as far south as Sydney where the plant flowers reliably.
Alloxylon is from the Greek allo, strange or different and xylon, wood, referring to the unique wood anatomy of the genus - oak-like grain with very broad medullary rays. Flammeum is Latin, meaning flame-coloured or fiery red.
It is listed as 'Vulnerable' under the EPBC Act* (ie. facing a high risk of extinction in the wild in the medium-term future, as determined in accordance with prescribed criteria). Which means if you have the space get one of these beauties in your garden!
It has shiny green elliptical leaves up to 18 cm long, and prominent orange-red inflorescences (An inflorescence is a group or cluster of flowers arranged on a stem that is composed of a main branch or a complicated arrangement of branches) that appear from August to October, followed by rectangular woody seed pods that ripen in February and March. Juvenile plants have large (up to 25 cm long) deeply lobed pinnate leaves.
It will flower most prolifically if grown in full sun in deep rich soil with extra water given in periods of hot dry weather. In its native habitat it can grow to around 25m tall. In a normal garden it will get to around 10m tall and I find it to be the perfect shade tree.
You can trim after flowering but it has a natural beautiful shape that does not require trimming. It will need a good fertilise every three months. I use Organic Link on all my natives.

Roses are Red
The rose has long been a source of fascination and meaningfulness for cultures around the world. I have never claimed to know the secrets of growing roses in a climate where for about six months of the year we have what feels like 100% humidity but here are a few of my tips.
The rose has long been a source of fascination and meaningfulness for cultures around the world.
Cleopatra was believed to have covered the floor of her palace room with roses before Mark Antony visited for in those times anything which was said "under the rose" was deemed to be a secret.
For many of us Queenslanders though how to keep roses looking amazing feels like a state secret.
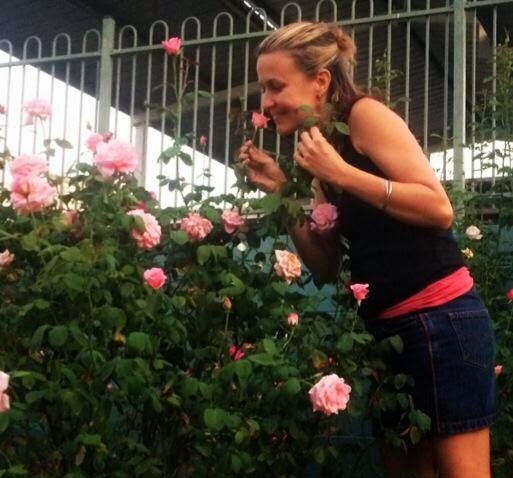
I often stare in awe at the pictures in magazines of roses elsewhere in Australia. How dare they have the climatic conditions to grow these plants successfully?
I have never claimed to know the secrets of growing roses in a climate where for about six months of the year we have what feels like 100% humidity.
Many rose growers out there will probably have a small heart attack at my way of growing roses but that’s ok, my way is the right way for me and maybe if you’ve never had any success in the past it may become the right way for you.
The first thing I needed to realise was that my roses may never look like they do elsewhere. The humidity we suffer is the cause of most rose problems. No amount of sprays, fertilisers or correct planting techniques will change the problems humidity brings.
To combat most of the rose problems such as black spot, fungus, bud worm that occur during the warmer months I trim and fertilise.
I don’t spray.
During the really humid months most of my roses look like bare thorny sticks. I find removing all the affected leaves, trimming back the plant and then fertilising with a slow release complete organic fertiliser like Organic Link works fantastically.
I always trim my roses like I am cutting the flowers off for a long stemmed vase. I personally can’t stand long straggly bushes so I make sure all my roses get a good prune continuously throughout the year. I also find a good dose of granular Sulphate Potash at least twice a year, Winter and Summer, helps with fungal problems and boosts blooms.
After pruning you can use a product like Steriprune which is designed to protect wounds against infections and die back. Come the cooler months and my roses are thick and lush and full of flowers. The few leaves that do get black spot or mould just get pulled off and when the flowers die, I still trim the stem right back like I am cutting it for a long stemmed vase.
To keep roses healthy and insect free I try to regularly liquid fertilise them with Rose Triple Boost and neem oil, fortnightly is ideal (but not always possible). When black spot is rife I alternate between the Rose Triple Boost and Silica and Potash Liquid fertiliser (certified organic).
Another organic alternative for black spot and rust is eco-fungicide. Eco-fungicide is a registered organic fungicide for the control of powdery mildew, black spot and rust in many plants including tomatoes, zucchini, roses, grapevines and geraniums. It attacks existing fungal infections and kills external fungal growth within minutes. Eco-fungicide also leaves an invisible protective coating that prevents new spores from germinating.

This Rose quote is so true even when growing roses. You must put up with all the disease, insects etc but it is well worth it when they bloom
To control insects some people like to use a pyrethrum based spray or neem oil.
All my roses are in full sun in pots and in the ground. I use Searles Platinum Potting Mix for the pots and Searles' Garden Mix for the ground. I mulch with Sugarcane.
Roses do not have the prettiest bush and they can sometimes seem a bit fussy but the reward of the rose is well worth it all.

Vintage Garden Plants - Hydrangeas
Hydrangeas are a beautiful old fashioned plant. These wonderful, hardy shrubs would certainly have to be included on the list of the best flowering plants in the world.

I like plants. You’ve probably already guessed that but what I mean is I love the diversity plants offer us in our lives. I love how the same plant can be used in a formal garden or a cottage garden and still look fantastic. I love how the popularity of certain plants is cyclic just like our fashion industry.
I adore old fashion plants or vintage styled plants (vintage makes me sound more fashionable!). I think there was a reason our grandmother’s gardens were full of certain plants. It was because they didn’t require much TLC to look fantastic all year.
Hydrangeas are one such plant. These wonderful, hardy shrubs would certainly have to be included on the list of the best flowering plants in the world.
Hydrangea flowers are absolutely stunning and with over 500 different cultivars there is sure to be one to suit everyone.
There are two main groups of flowers these cultivars are split between – Mopheads and Lacecaps.
Mophead flowers are large round flower heads resembling as the name implies the head of a mop. In contrast, lacecap flowers bear round flat flower heads with a centre of subdued, fertile flowers surrounded by outer rings of showy, sterile flowers.
Hydrangea flowers usually appear from early spring through to late summer.
It is the colours of the hydrangea flower that I find most amazing. The colours range from white through to red, pink, purple, and blue but the amazing part is I can change the colour of my flower!
The acidity of your soil determines the colour of the flowers. If the soil is acidic the flowers will be blue, electric blue or even peacock blue but if the soil is more Alkaline the flowers will be pink through to red, neutral is purple of course.
The white cultivars remain white regardless of the soil pH. To make sure you get the colour you want you must change the soil pH before flower buds form. I would always check your soil's pH before starting any treatments.
Even though the hydrangea flower is impressive, the foliage too can be quite remarkable. Most hydrangeas have large lush dark green oval leaves, often with serrated edges but some have variegated green and white leaves.
I find hydrangeas to be very hardy ONCE established. The trick is to preserve to get them established. They are best grown in part shade but I have seen some beautiful plants grown in full sun. I find the flowers on these full sun bushes tend to burn off too quickly though in our hot summer sun.
Many of the cultivars available today are compact growing. I find many people believe they aren't good hydrangea growers as their plants are always so small! So make sure you check how big your actual hydrangea grows before you start to feel bad. Due to the compactness I find they do well in both pots and gardens.
I tend to fertilise with a carbon based organic fertiliser, Organic Link, every three months. I also like to liquid fertilise once a fortnight. I alternate fortnights between Triple Boost and Silica and Potash. I find a small prune in late Autumn will help promote next seasons growth and flowers.
If you have struggled with hydrangeas in the past, try growing them again but stick with them. I find pots work well for people who don't have great soil.
About 18months ago I put some hydrangeas into my garden. It was a warm shade spot that received warmth but no sun in winter and morning sun in summer. The soil was loose and well composted (pretty perfect, even if I do say so myself!). They were well watered but not over watered (they may have dried out a few times ... oops). There was many occasions I almost gave up on them. This spring though they have finally gotten their roots in and are taking off. I feel proud to say I am a Hydrangea mumma!
If you feel Hydrangeas and you aren't meant to be, that's ok. Think of them as a really long lasting bunch of cut flowers. Enjoy them all spring and summer in a pot and when it looks sick it's time to part ways. Plants are meant to be enjoyed not stressed over!
Hydrangeas are one of my vintage must haves for your garden as they require not much TLC once established. Plus the anticipation of wondering what colour will it flower this year is a cheap but wonderful thrill all gardeners experience.